Perfect your Romanian deadlift technique with these crucial setup steps to maximize glute and hamstring engagement during your lifts.
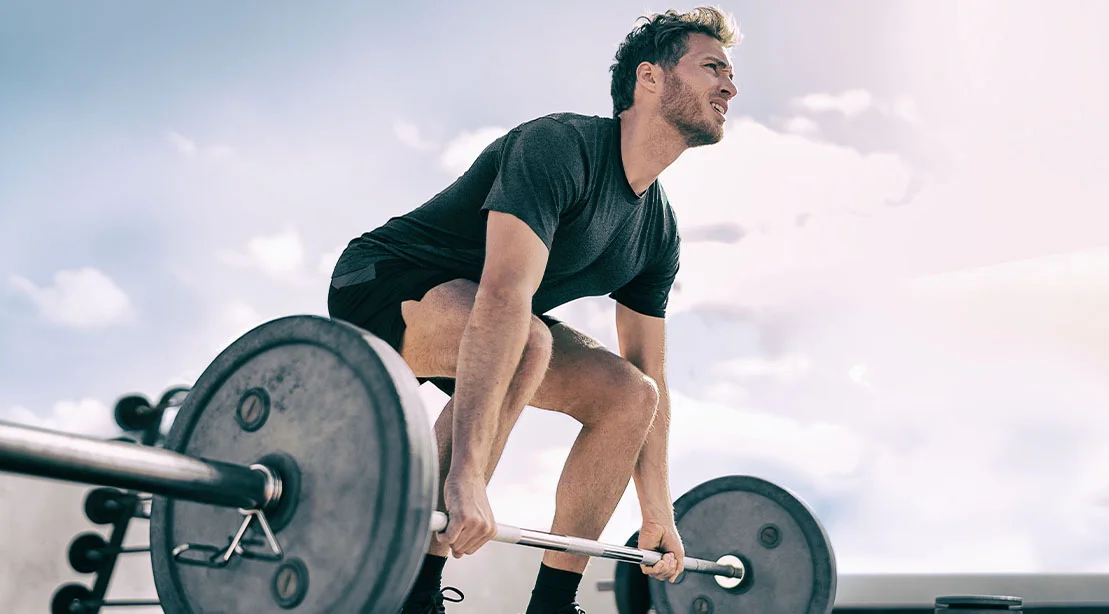
Many lifters often fall into the trap of rushing their workout setup. While the instinct to get to the lifting phase quickly is understandable, neglecting proper preparation can significantly impact both performance and safety. The Romanian deadlift (RDL) exemplifies this issue; it's not merely about bending over with a barbell and expecting results. If your feet aren’t grounded properly, your core isn’t tight, or the bar path strays from your quads, you’re likely to overstrain your lower back rather than effectively engaging your target muscle groups.
The pathway to performing a successful RDL begins before you even grasp the bar. Understanding the critical setup components can greatly enhance your lifting experience and results. Here’s a thorough pre-lift checklist designed to align your posture and form, culminating in a more effective exercise. Though these preparatory actions may initially feel cumbersome, consistent practice will make them second nature, leading to improved outcomes and muscle development.
Essential Steps for Perfecting Your Romanian Deadlift Setup
Prioritize these seven critical steps for an effective RDL, ensuring you’re in the best position to lift.
1. Adjust the Rack Height
Your first step involves setting the J-hooks at an appropriate height, allowing you to lift the bar with a slight knee bend without expending unnecessary energy. Ideally, the bar should rest around hip height. You want to ensure that you can initiate your lift without it becoming a partial deadlift, which could throw off your form.
- Position the bar at hip level.
- Center yourself correctly before lifting.
- Stand tall as you clear the J-hooks without pulling the bar awkwardly.
- Take a couple of steps back to establish your stance.
Internal cue: Maintain a tall posture through the lift.
External cue: Aim to clear the hooks smoothly.
Tip: Save energy by keeping the unracking process simple.
2. Establish Your Stance
Begin with your feet about hip-width apart, keeping your toes pointing mostly forward, perhaps with a very slight outward angle if that feels more comfortable. Form a strong base by creating a 'tripod' effect with your heel and the bases of both your big and little toes.
- Stand with your feet positioned hip-width apart.
- Align your toes forward or slightly outward as preferred.
- Establish a solid foot connection to the ground.
- Create tension by mentally 'screwing' your feet into the floor without moving them.
- Keep this foot stance stable throughout your lift.
Internal cue: Feel your entire foot contacting the ground.
External cue: Visually 'screw' your feet into the surface.
Tip: You’ll know you’ve rooted successfully when you sense tension in your outer glutes.
3. Configure Your Grip
Your grip is crucial for establishing tension through your entire upper body, which helps you maintain a connection with the bar. Start with an overhand grip, positioning your hands just outside your thighs. Ensure the bar rests at a low position in your hands with a neutral wrist stance.
- Grip the bar just outside your thighs to optimize tension.
- Utilize a double-overhand grip at the outset.
- Wrap your thumbs around the bar firmly.
- Keep your wrists in a neutral position.
- Squeeze the bar tightly.
Internal cue: Visualize yourself crushing the bar.
External cue: Try to leave fingerprints in the surface of the bar.
Tip: Don't hesitate to use straps if needed; the focus is muscle engagement, not grip strength.
4. Soften Your Knees
A slight flex in your knees prior to the hinge helps you avoid transforming the RDL into a stiff-legged deadlift. However, be mindful not to deep bend your knees during the hinge motion, as this could inadvertently turn it into a squat.
- Keep a minimal amount of knee flexion as you perform the setup and throughout the lift.
- Avoid excessive bending as the bar descends.
Internal cue: “Soft knees, hips back.”
External cue: Allow your knees to slightly shift forward.
Tip: Monitor your knees from the side; they should flex slightly at the start without straying as you hinge.
5. Lock In Your Back
To maintain proper form, you must connect the barbell to your upper body effectively. Engaging your lats ensures the bar remains close to your legs, avoiding unnecessary strain on your lower back. Pull your shoulders down and away while establishing tension through your upper back prior to lifting.
- Keep your shoulders down, away from your ears.
- Allow your arms to extend fully.
- Engage your lats by squeezing your armpits together.
- Maintain consistent tension in the upper back.
Internal cue: Squeeze your armpits tightly.
External cue: Visualize bending the bar around your legs.
Tip: Just sufficient tension is all you need; conserve some energy for the lift.
6. Engage Your Core
Neglecting core engagement can drastically compromise your performance and form. Inhale deeply into your abdomen prior to the hinge, creating intra-abdominal pressure. This 'brace' should involve tightening your core rather than merely sucking in your stomach. Ensure that your ribcage remains stacked above your pelvis as you progress through the exercise.
- Take a deep breath and expand your abdomen, side torso, and lower back.
- Brace your abdominal muscles around that expanded breath.
- Keep your ribcage directly over your pelvis.
Internal cue: “Brace all around.”
External cue: Visualize your torso as a solid cylinder.
Tip: Breathe in through your nose while keeping your mouth closed, then brace.
7. Position Your Head and Neck
Your head and neck positioning plays an essential role in maintaining an optimal alignment during the lift. Avoid staring straight ahead throughout the exercise; this can result in unwanted neck strain. Instead, keep your head neutral initially, and allow your gaze to follow along with the movement of your torso.
- Start with your head centered over your shoulders.
- Maintain your chin in a comfortable, neutral position.
- Adjust your gaze downward as your torso hinges forward.
- Preserve the same head-to-torso relationship during each phase of the rep.
Internal cue: Keep your neck elongated.
External cue: Ensure your head remains between your shoulders.
Tip: Stay conscious of your gaze; excessive mirror-checking can disrupt your focus.
Checklist for Successful Execution
Before initiating your first rep, confirm that you’ve checked off these essential points:
- Feet positioned: hip-width apart, with full foot contact on the ground.
- Grip established: hands laid just outside thighs, firmly squeezing the bar.
- Knees softened: slight bend maintained during hinge.
- Lats engaged: shoulders lowered, with a strong connection to the bar.
- Core braced: maintaining solid tension throughout.
- Ribcage stacked: ribs aligned over the pelvis.
- Head appropriately positioned: neck aligned with torso.
When all these elements are in place, you're ready to begin the hinge.
Common Mistakes in RDL Execution
Once you’ve grasped the hinge technique, the RDL tends to seem straightforward, yet several common pitfalls can undermine its effectiveness.
Bar Drift
Allowing the bar to drift away from your legs diminishes leverage and increases the load on your lower back. Even minor deviations can derail your form.
Fix: Maintain engagement in your armpits, keep arms extended, and ensure the bar stays close through each rep.
Squatting Instead of Hinging
Executing too much knee bend shifts the nature of the RDL towards a squat, which decreases tension on the hamstrings.
Fix: Unlock your knees prior to the hinge and retain that degree of bend throughout the motion.
Rushing the Lowering Phase
The eccentrically loaded phase is vital for hamstring development; dropping too quickly can reduce tension in this area.
Fix: Slow down the descent by counting to three on your way down for optimal engagement.
Lower-Back Dominance
Finishing the lift with an overextension at your lower back can lead to strain and improper form. Understanding the difference between hip and lower-back extension is critical.
Fix: Complete the lift by driving your hips forward and squeezing your glutes until you're fully upright.
The Final Takeaway
The Romanian deadlift is a powerful exercise, but performance is about more than just achieving a wide range of motion. Focus on muscle tension and maintaining a strong hip hinge throughout your lift.
Begin with properly positioning your feet and grip, unlocking your knees, and engaging your lats and core. Then, hinge backward while keeping the bar close to your body and upholding the form you've carefully cultivated.
By emphasizing these details, you'll amplify the effectiveness of your workout and enhance muscle growth in your glutes and hamstrings.


Discussion
Sign in to join the discussion.